Whether you love it or loathe it, Halloween is now the UK’s third most profit-generating holiday after Christmas and Easter – with a staggering £687 million estimated to be spent this year.
The popularity surrounding Halloween has exploded in recent years as popular culture moves more freely between countries and continents – what was once a much-loved holiday in America is now a staple on the calendar for UK households.
According to the social media management tool, Sendible, ‘the best Halloween marketing campaigns often feature clever storytelling with a heavy focus on video’. This was the perfect excuse (not that we needed one) to get the ghoulish juices flowing within the Dead Ready animation team.
In this article we showcase our Halloween-inspired stop motion animation, share some behind the scenes of how it was made, explain what stop motion is and the different styles of stop motion that exist, and provide a helpful ‘how to’ guide to carving the perfect pumpkin!
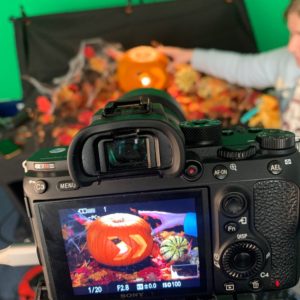
Behind the scenes
Animator, Mia Moore, talks us through the different stages for producing our Halloween stop motion animation.
Stage 1: Concept & Planning
The concept stage is the most important part of the stop motion process. Not only do we come up with the initial idea, but also what will be needed to achieve the final product. Props and decoration are one thing, but tools needed to achieve certain movements and effects also need to be considered. Stop motion is very physical, so if something inanimate were to jump, how would we suspend it in mid-air? There are a lot of unseen tricks to achieve seemingly simple actions, and this is the stage where we discuss what can be done.
For example, the idea to have the pumpkin close its eyes and laugh came from the very beginning, but it’s impossible to un-carve a pumpkin so we had to think backwards, from the last frame to the first, and figure out what could be done to achieve this effect. In the end, we carved the pumpkin in a very specific manner so it started off with closed eyes which could open and shut with some clever editing.
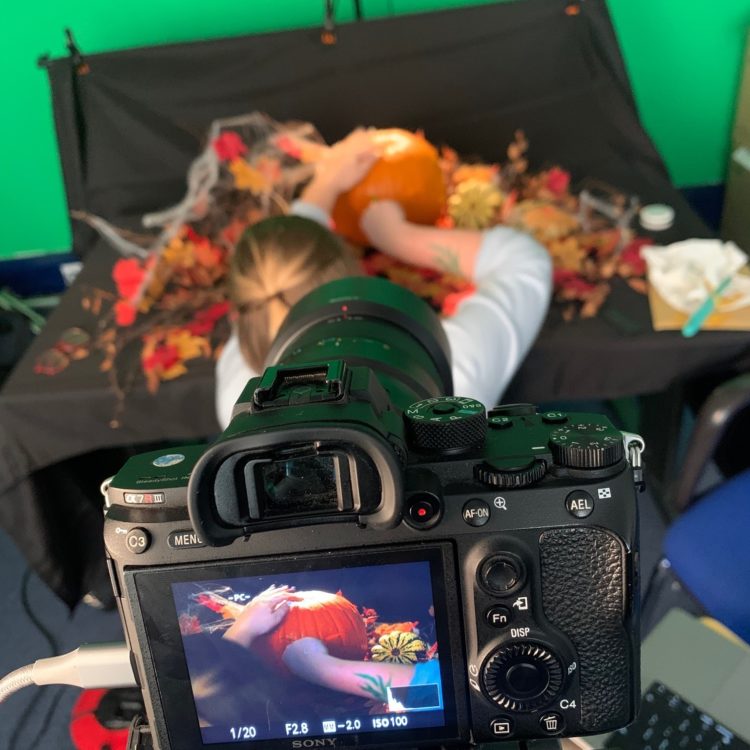
Stage 2: Set Design
A physical set was needed for this animation. We decided on a natural forest scene, with dead branches, leaves and cobwebs. It’s important to set up the camera first before building your set, as you only want to decorate where the camera can see. We wanted to keep the spooky atmosphere as natural as possible and let the light inside the pumpkin do most of the work, so we had to shoot the set in low lighting.
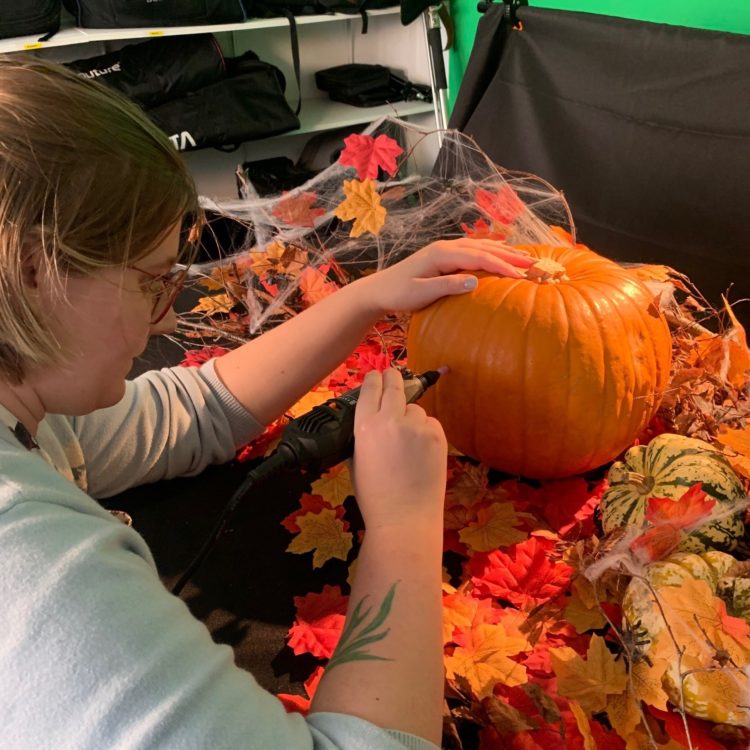
Stage 3: The Shoot
We used classic carving tools and with every small cut into the pumpkin, two photos were taken – when played in a sequence the pumpkin appears to be moving on its own. Being flexible and adaptable is very important on a stop motion shoot as no matter how much you prepare you have to accept that things could change last minute on the day. Despite taking longer to cut than we had anticipated, our shoot ran smoothly.
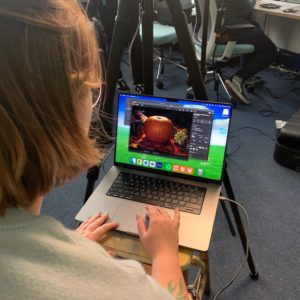
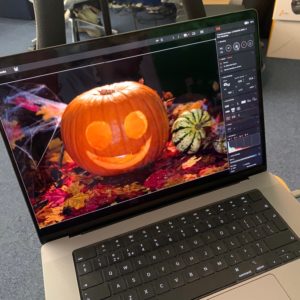
Stage 4: Editing
Raw camera footage can only go so far, so a lot of the time stop motion has to go through a post-production phase. This was especially true for our Halloween animation, as we had to edit some features of the pumpkin to play in reverse to achieve the impression of laughter. This was created using the masking tool in After Effects as I wanted to be able to animate the eyes and mouth separately so that they could create new expressions that didn’t previously exist in the raw footage.

Watch a time lapse video showing the making of our Halloween stop motion animation.
What is stop motion animation?
Stop motion is an animated filmmaking technique in which objects are physically manipulated in small increments between individually photographed frames, so that they appear to exhibit independent motion or change when the series of frames is played back.
What are the different styles of stop motion animation?
Object Motion
Uses the animated movements of any non-drawn objects such as toys or dolls, and similar items which are not fully malleable such as clay or wax, and which are not designed to look like recognisable human or animal characters. (Wikipedia)
Claymation
Involves the sculpture and frame-by-frame manipulation of clay-based characters or objects. The most famous examples of this technique are the multi-Oscar-winning duo Wallace & Gromit. (Adobe)
Pixilation
Live actors are used as a frame-by-frame subject in an animated film by repeatedly posing while one or more frame is taken and then changing pose slightly before the next frame or frames are taken. (Wikipedia)
Cutout-Motion
One of the oldest and most simple techniques there is, cutout motion involves making 2D animation using characters, props and scenes made from materials including paper. (Adobe)
Puppet Animation
Involves puppet figures that are animated frame-by-frame. Usually, the animators create a physical three-dimensional scene, similar to a small theatre, where the action will take place. (Toonboom.com)
Silhouette Animation
Pioneered by European studios during the 1920s, silhouette animation combines the use of cutout-motion and clever shadow play to produce fascinating frames of action. (Adobe)
It’s not a Halloween blog without a ‘how to carve a pumpkin’ guide!
We’ve prepared this quick and easy guide to help you through the steps of carving the perfect pumpkin.
Step 1. The Lid
Make sure that when you take the top off it is slightly cone-shaped. This will help make sure that when you place it back on the pumpkin it doesn’t fall into the middle. To do this, angle the knife downwards into the pumpkin to form a cone.
Top Tip: Use a small serrated knife. If you can find one that is slightly flexible it will help you go round corners when it comes to cutting out your design.
Step 2. The Innards
You now need to remove the seeds and the stringy tissue to form a centre cavern. To do this, scrape down the sides of the inside of the pumpkin with a robust spoon. Once you’ve worked your way around the entire contents of the middle, the innards should come out in one go.
Top Tip: Place a biodegradable bag over the entire pumpkin, tip the pumpkin upside down and all the innards will fall straight into the bag.
Step 3. Your Design
Once you’ve either picked your design from the hundreds of templates on the internet or sketched out your own, it’s time to draw or mark your outline on the pumpkin. A biro draws easily on pumpkin skin and if you make any mistakes, it can be rubbed off, but you can also use a large pin to mark dots along the outline which you can then use as a guide for your knife.
Top Tip: If you want to add an extra twist to your design try using black chalkboard paint on your pumpkin.
Step 4. Get Cutting
The best way to cut out your design is to trace over the lines you have drawn with the knife, piercing the skin by just a few millimeters – you don’t want to push through the full depth of the pumpkin just yet. Once you have your preliminary cuts you can now start carving through the full depth of the pumpkin. The deeper cuts will naturally follow the shallow cuts you previously made.
Start with the inner least structural parts of your design and work your way out. To ensure most light comes through, make sure that the direction you are carving is perpendicular to your outlines – you are going to be viewing your pumpkin from the front, so the light won’t shine through parts where the flesh remains. You can vary the amount of light showing in the design by cutting some areas to half depth.
Top Tip: Rotate the pumpkin as you cut out the various parts of your design, so the knife is always moving in the same direction. This will help improve the accuracy of your cuts.
Step 5. Lights On
When it comes to lighting your pumpkin there are electronic candles available which are safe for children, but for the best effect there’s no substitute for using two tea light candles placed inside your pumpkin.
Did you follow our pumpkin carving ‘how to’ guide?
If so, we’d love to see your pumpkin creations so share them and tag us on Instagram and Facebook using the hashtag #DeadReadyPumpkin.
If you would like to find out more about stop motion or any other type of animation, please feel free to get in touch via the button below or by calling +44 (0)208 339 6139.